Local development of trading strategies
Using a Conda environment
The Quantiacs library (QNT) works well for local strategy development. We recommend Conda because it handles dependencies reliably.
Setup instructions
Follow these steps to create an isolated environment on your machine using conda:
Install Anaconda: Download and install Anaconda from the Anaconda website.
Tip: Anaconda comes pre-loaded with all the packages. If you want a smaller footprint on your system, you can use Miniconda instead.
Create a QNT development environment:
Open your terminal and run:
conda create -n qntdev -c conda-forge 'python>=3.11,<3.14' 'ipywidgets=8.1.7' 'nbformat>=5.10.4' ipykernel ta-lib 'quantiacs-source::qnt' dash
conda activate qntdev
Optional: Prevent auto-activation of this environment:
conda config --set auto_activate_base false
API key configuration:
Retrieve your API key from your Quantiacs profile.
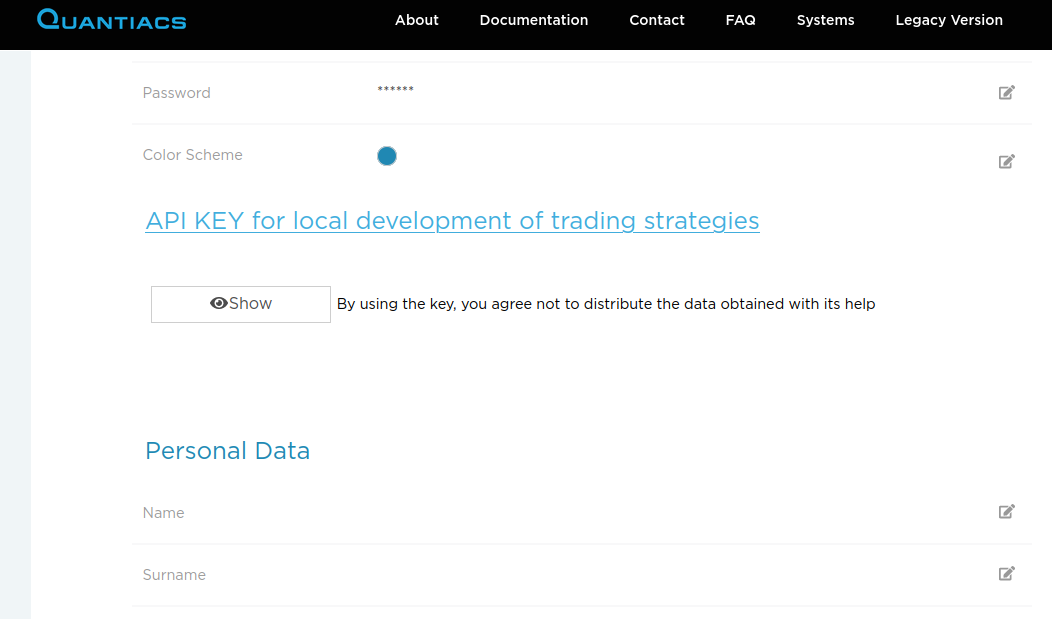
Set the API key in your environment:
conda env config vars set -n qntdev API_KEY={your_api_key_here}
Alternatively, set the API key in your code (useful for IDE compatibility issues):
import os
os.environ['API_KEY'] = "{your_api_key_here}"
Using the environment:
Activate the environment with:
conda activate qntdev
Deactivate when done using:
conda deactivateAlways reactivate when returning to development.
Strategy development:
Develop in your preferred IDE.
For Jupyter notebook usage:
jupyter notebook
Contest participation:
Develop and test your strategy, then submit it to Quantiacs contests.
Updating the conda environment
Update the QNT library periodically to get the latest features and bug fixes:
    ## you can remove the old one before that
    # conda remove -n qntdev quantiacs-source::qnt

    conda install -n qntdev quantiacs-source::qnt
You can see the library updates here.
Pip environment
Note: Conda is recommended, but Pip works too, especially if Conda is not an option.
This one-liner installs Python, creates a virtual environment, and installs the needed libraries.
Single command setup
One command setup:
Ensure you have
pyenvandpyenv-virtualenvinstalled.Run the following command in your terminal:
pyenv install 3.11.13 && \
pyenv virtualenv 3.11.13 name_of_environment && \
pyenv local name_of_environment && \
python -m pip install 'ipywidgets==8.1.7' 'nbformat>=5.10.4' dash ipykernel git+https://github.com/quantiacs/toolbox.git
This command will:
Install Python 3.10.13.
Create a virtual environment named
name_of_environment.Activate the environment for the current directory.
Install the Quantiacs toolbox and other necessary Python libraries.
TA-Lib installation:
The TA-Lib library may need to be installed separately due to its specific installation requirements.
Setting the API key:
Set the Quantiacs API key in your code:
import os
os.environ['API_KEY'] = "{your_api_key_here}"
Replace
{your_api_key_here}with the actual API key found in your Quantiacs profile.
Updating the pip environment
Use this command in your environment to install the latest version from the git repository:
python -m pip install --upgrade git+https://github.com/quantiacs/toolbox.git
Google Colab support
If you want to use Google Colab with a hosted runtime, start with this notebook.
This notebook contains the necessary commands to configure a hosted runtime.
If you use colab with a local runtime, then you can use regular conda environment. Go to the head of this page and follow the instructions for conda.
Working example Jupyter Notebook or Jupyter Lab
You can open any strategy on Quantiacs and check dependencies.
Launch Jupyter: Start Jupyter Notebook or Jupyter Lab.
Open a strategy file: Load any
.ipynbstrategy file.List dependencies: Execute
!conda listin a notebook cell to display installed packages.Review dependencies: Make sure all required dependencies for your strategy are present and up to date.
This quick check helps keep your Quantiacs development environment in working order.
How to check the qnt library
To use the Quantiacs (qnt) library, follow these basic steps to create and run a trading strategy.
Step 1: Create a strategy
First, define your trading strategy. The strategy.py file below shows a basic long-short strategy based on the
crossing of two simple moving averages (SMAs) with lookback periods of 20 and 200 trading days.
Example strategy: simple moving average crossover
Here is a trading strategy implemented with the qnt library:
# import os
#
# os.environ['API_KEY'] = "{your_api_key_here}"

import qnt.ta as qnta
import qnt.data as qndata
import qnt.backtester as qnbk
import xarray as xr


def load_data(period):
    data = qndata.futures_load_data(tail=period)
    return data


def strategy(data):
    close = data.sel(field='close')
    sma200 = qnta.sma(close, 200).isel(time=-1)
    sma20 = qnta.sma(close, 20).isel(time=-1)
    return xr.where(sma200 < sma20, 1, -1)


qnbk.backtest(
    competition_type="futures",
    load_data=load_data,
    lookback_period=365,
    test_period=2 * 365,
    strategy=strategy
)
Step 2: Run the strategy
After creating your strategy, run it from the command line:
python strategy.py
This runs the strategy.py script, which calls the backtest function from the qnt library. Make sure the qnt library is installed in your Python environment and that the environment is set up to access market data.
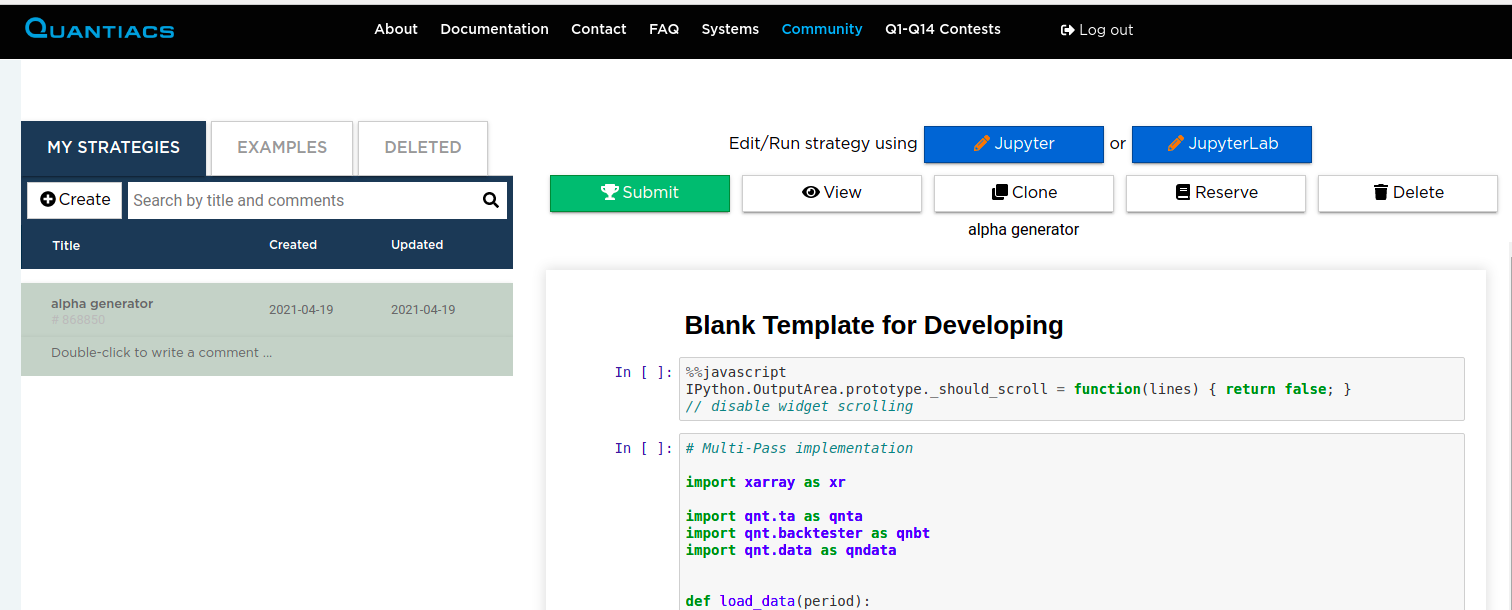
Submitting your strategy:
When you finish with developing your strategy, you need to upload your code in the Jupyter Notebook environment on the Quantiacs webpage. There are 2 options:
a) Copy and paste your code inside the cell of a Jupyter Notebook:
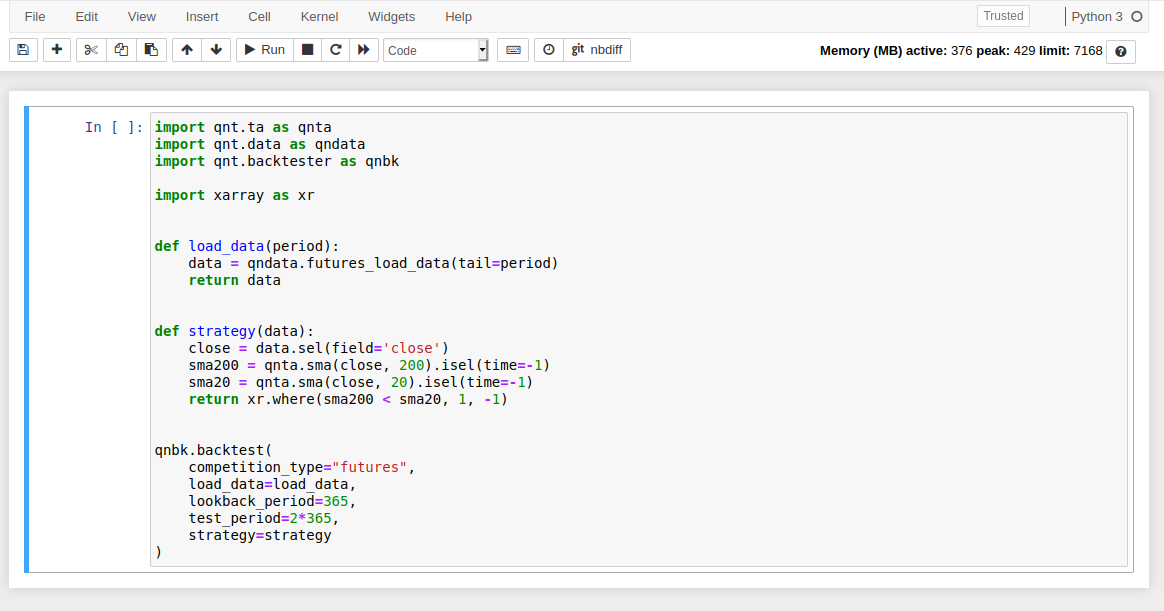
b) Upload your python file (for example, strategy.py) in your Jupyter environment root directory and type in strategy.ipynb:
import strategy
Place the installation commands for external dependencies to init.ipynb.
Run all cells to test your strategy in the Jupyter Notebook. Fix the errors if it is necessary. It is a good idea to run the file precheck.ipynb.
Send your strategy to the Contest from the Development area on your home page by clicking on the Submit button: